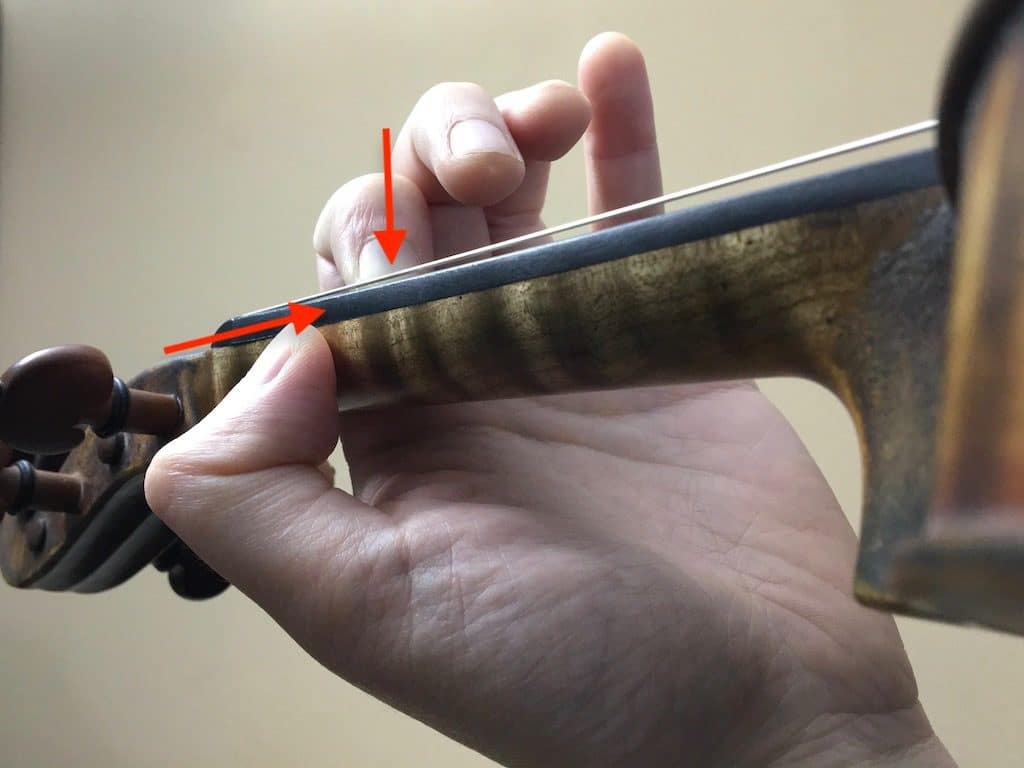
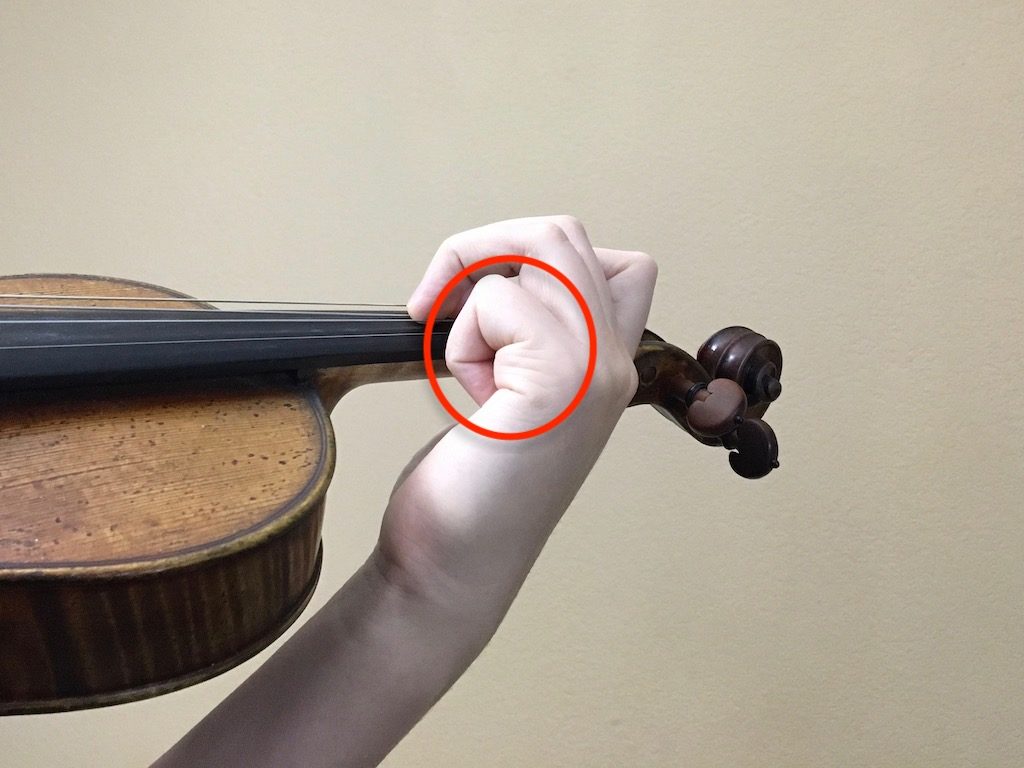
Contact Points of the Left Hand: Three in Normal Playing and Two When Vibrato
Normally there’re three points of contact with the instrument: left thumb, side of the index finger base (blue circle), and finger(s).
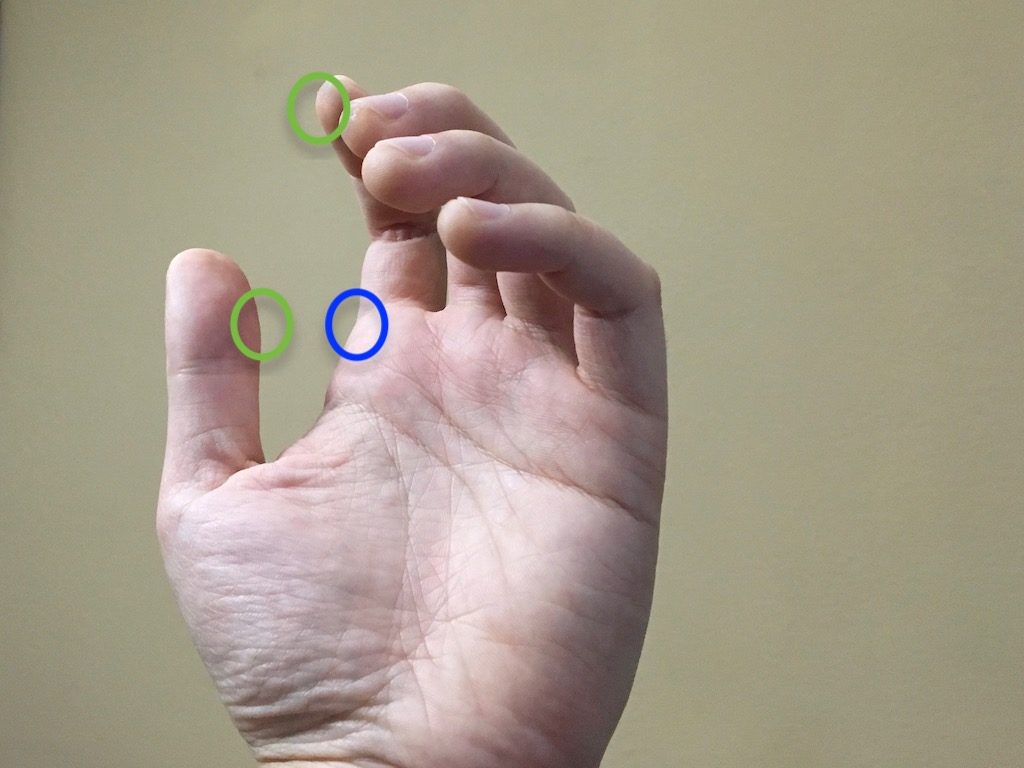
When playing vibrato, only the thumb and finger (only one finger at a time) contact the instruments because having too many contact points would stop the hand from waving back and forth, making vibrato difficult. Note the gap between the base of index finger and the instrument’s neck.

The Left Thumb: Supporting But Not Gripping
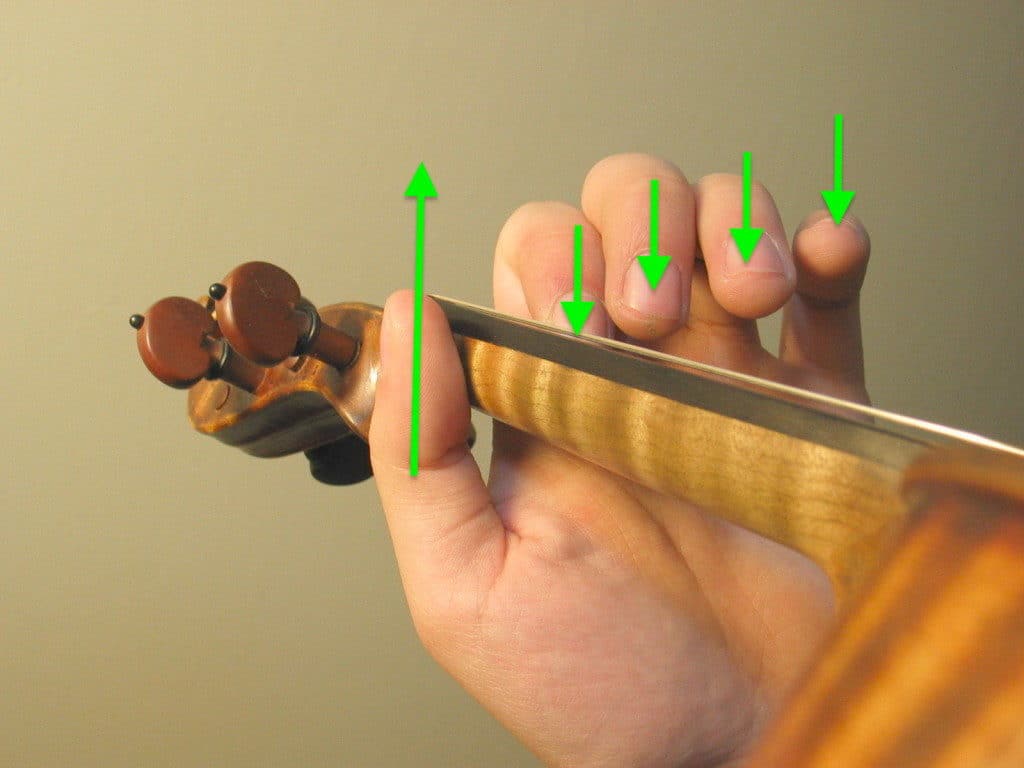
The left thumb’s role is to support finger pressure and partial weight of the instrument. The green arrows in the image show the opposing forces the thumb and fingers are exerting on each other. In low positions the thumb is placed across the index finger or middle finger.
Left thumb is placed at the end of the instrument’s neck when playing at high positions.
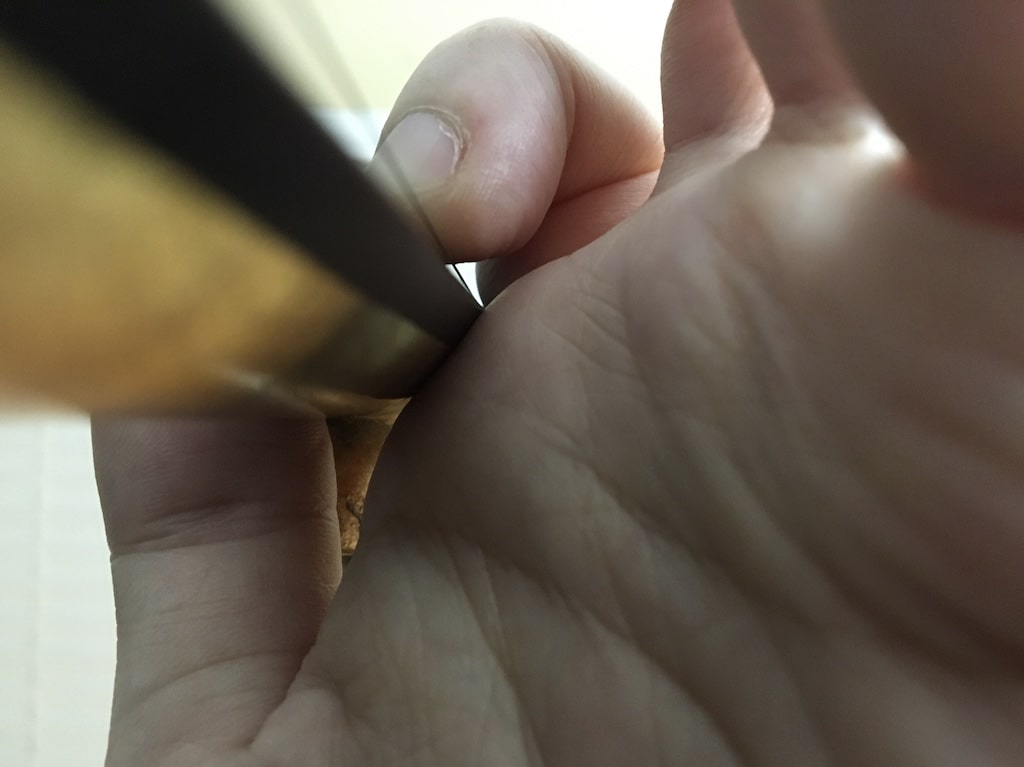
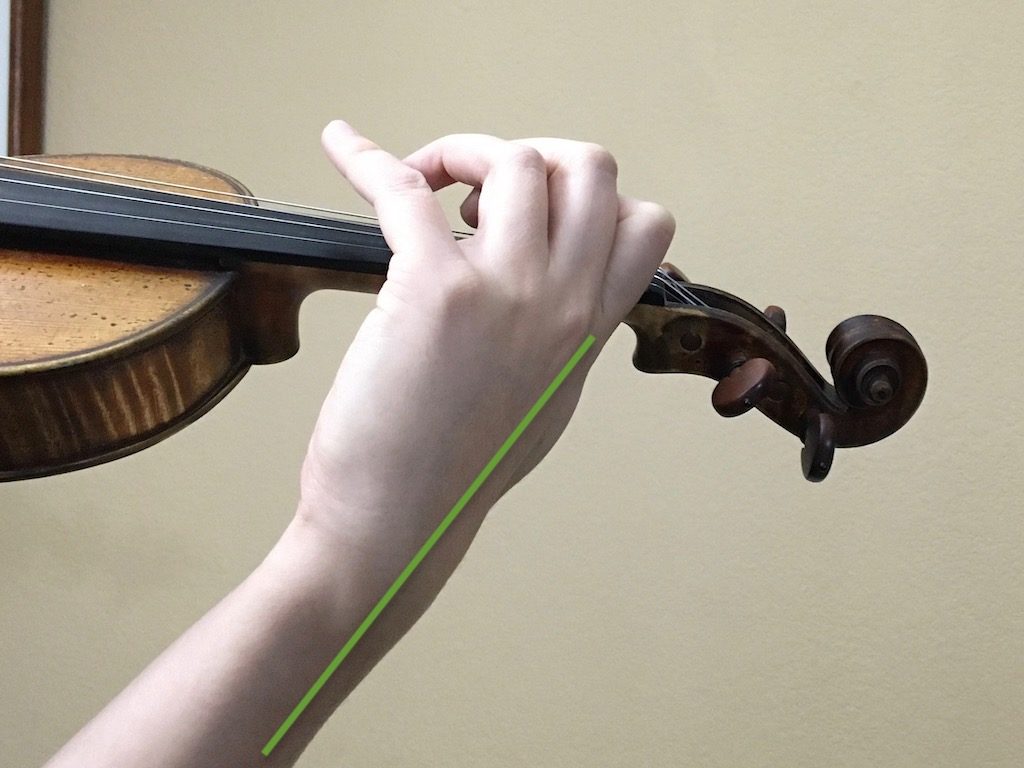
The image below shows a common mistake. The thumb grips the violin with sideway force. It does not support the pressure of the fingers. This gripping posture immobilizes the entire left hand.
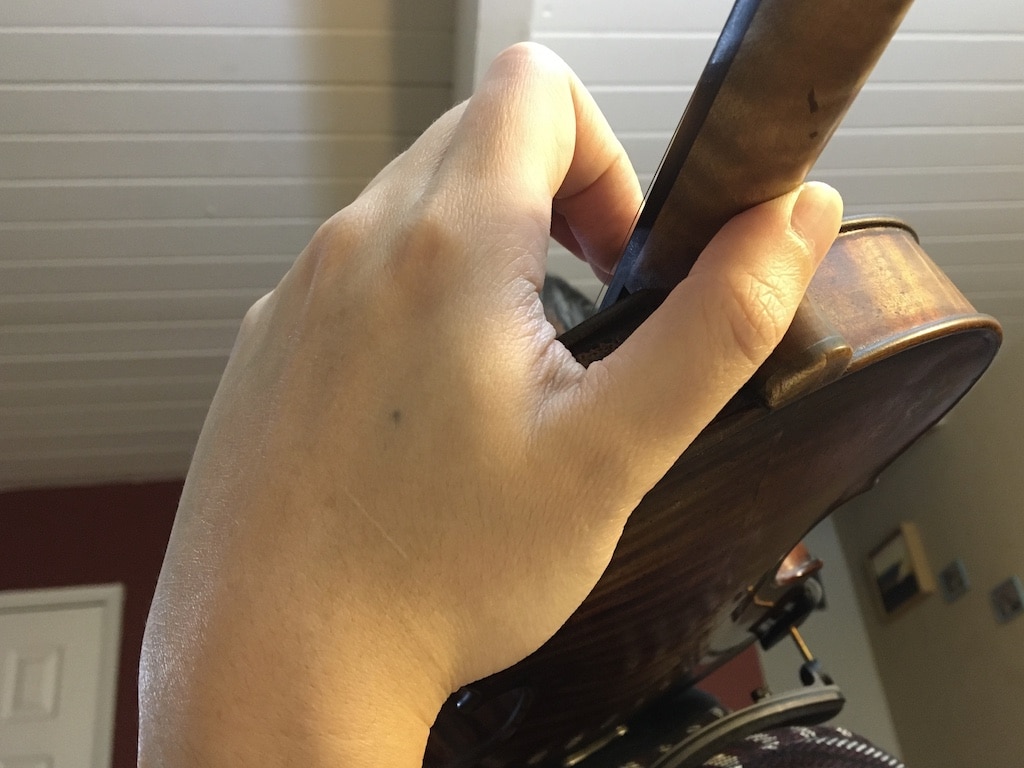
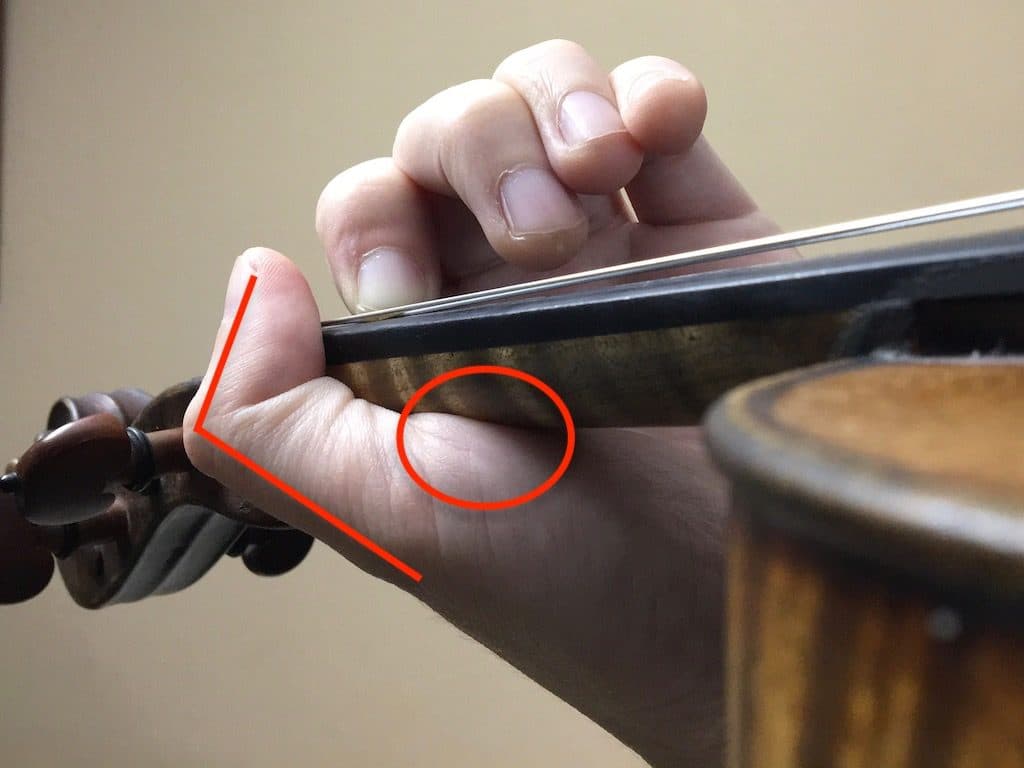
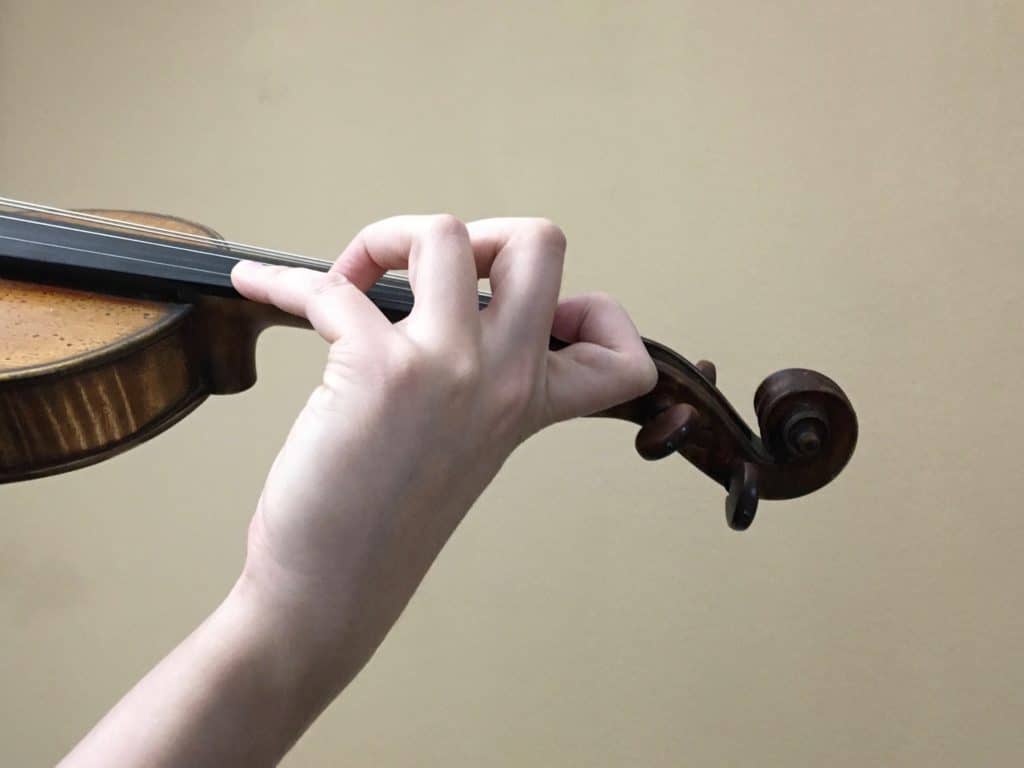
Two more common mistakes. In first image it’s incorrect to use the base of thumb as support point. This makes finger extension and vibrato very difficult. It will severely effects shifting technique because the hand cannot move freely. This wrong posture is associated with a collapsed left wrist (see the following section). The second image shows similar problem, except the supporting point is incorrectly placed at the purlicue (space between thumb and index finger).
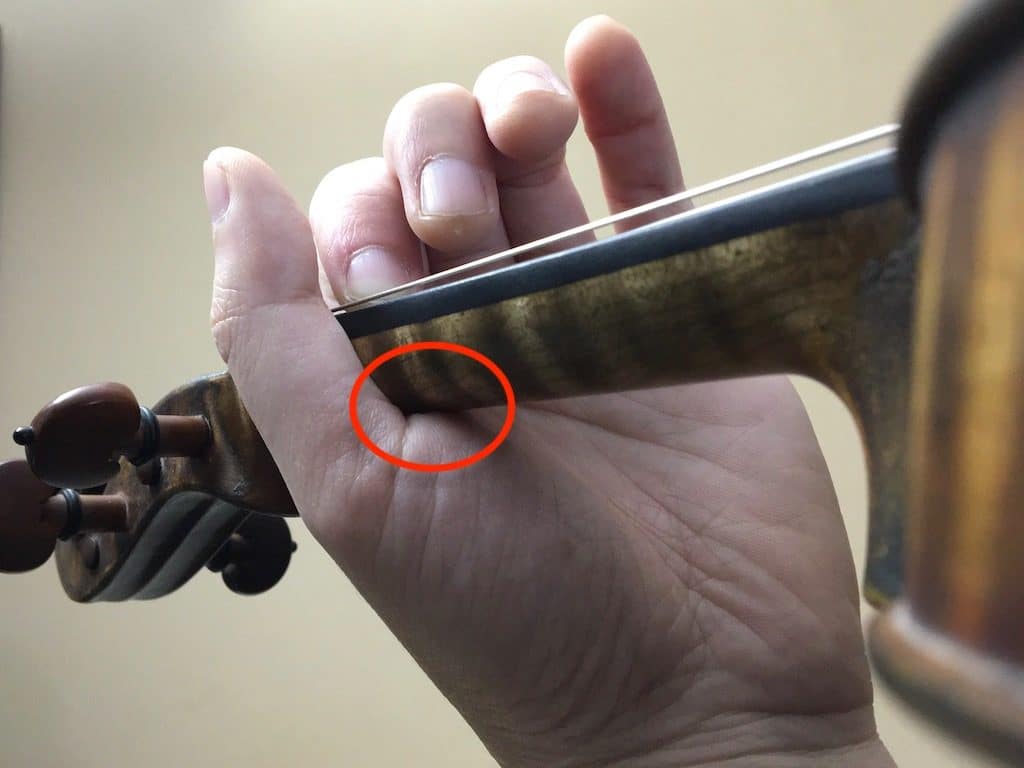
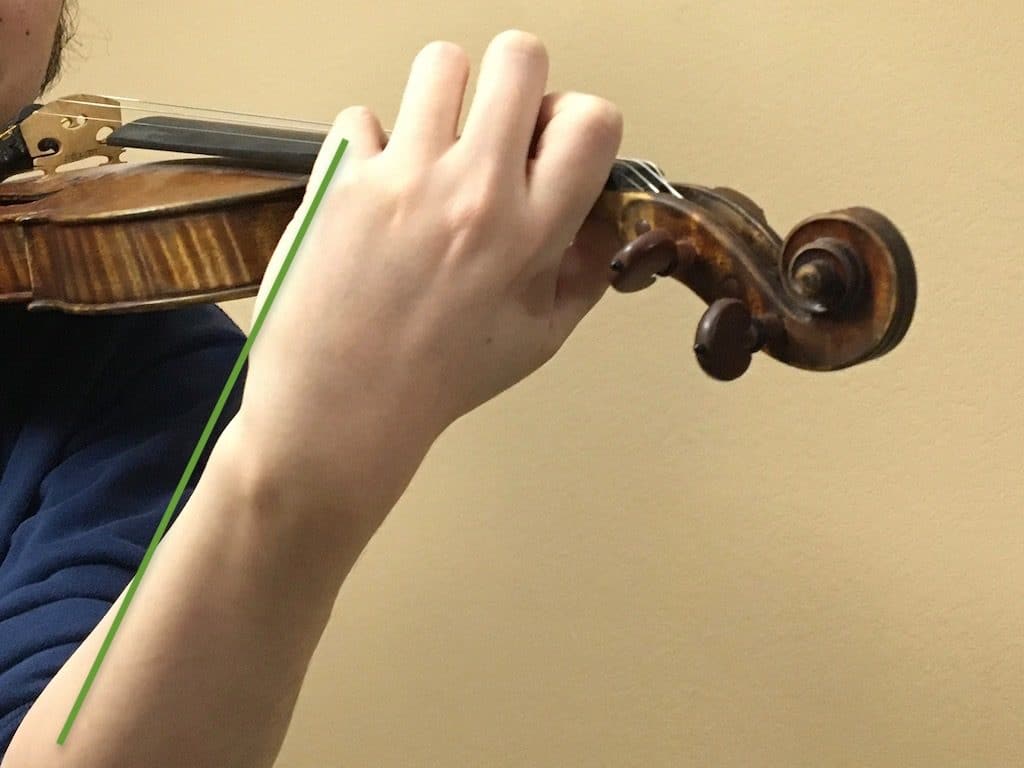
Compare with the following image for correct posture. There should be a space between the instrument’s neck and the purlicue. To check, see if the space is large enough to fit a pencil through.
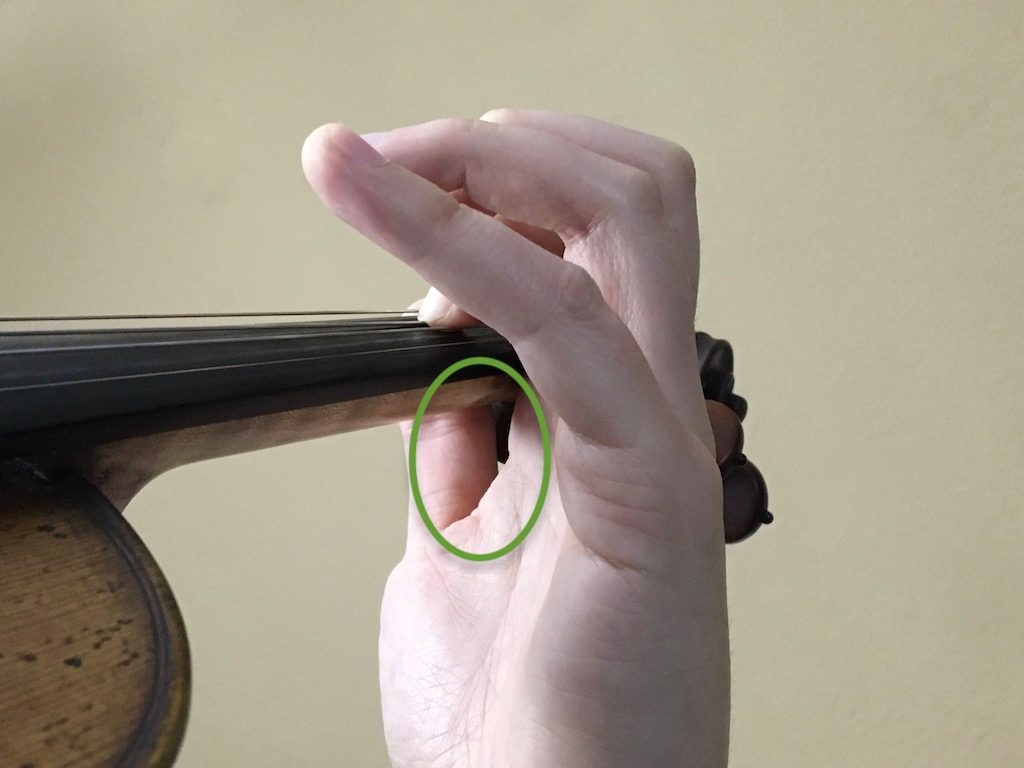
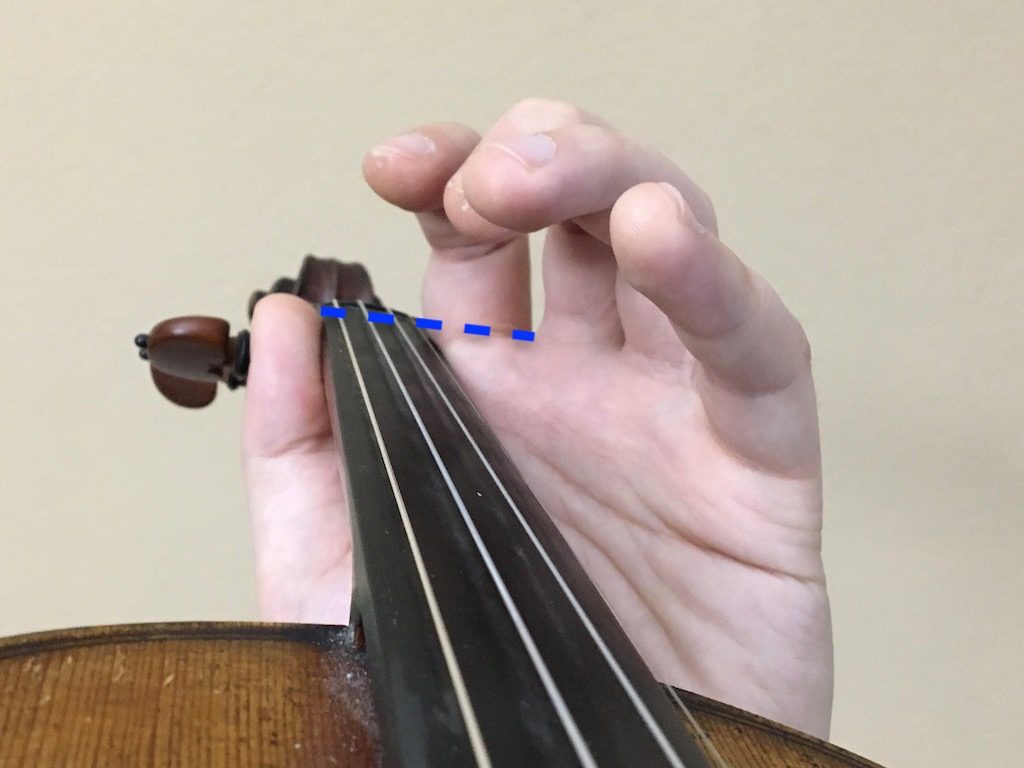
Another way to check the supporting point is to align the base joint of the index finger with the top of fingerboard (indicated by blue dotted line).
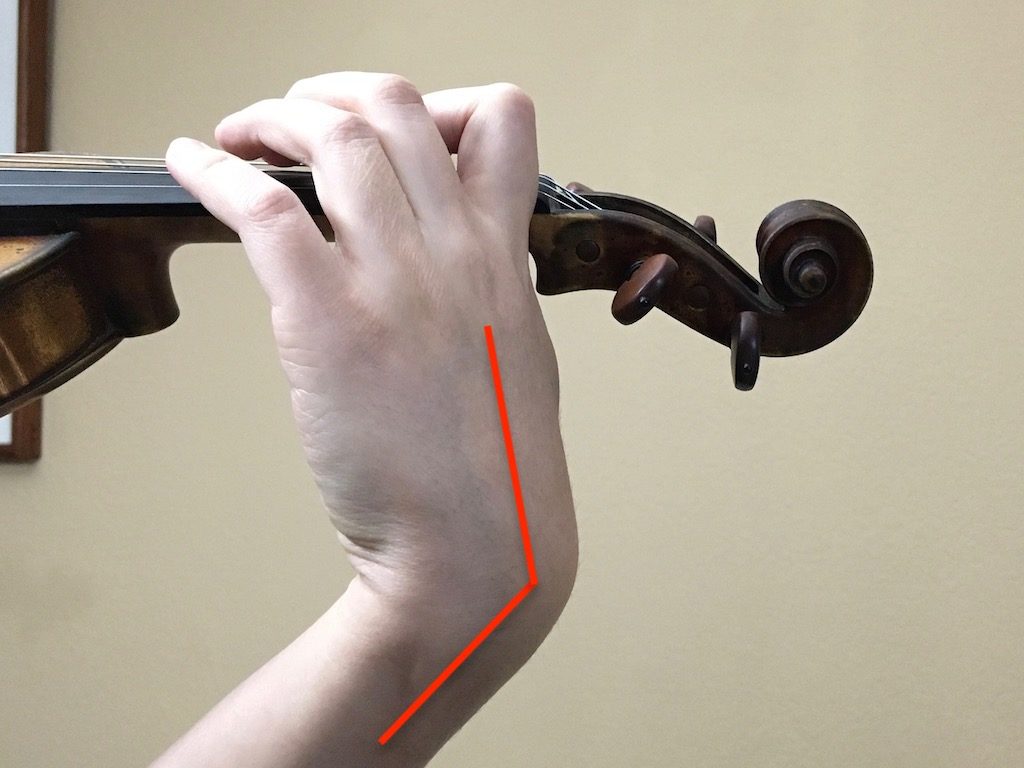
Left Wrist: Keep it Straight And Relaxed
The left wrist must be straight. It ensures proper finger extension, mobility of the left hand, and relaxed vibrato.

The following image shows how the wrist has to be straight in order for the fingers to extend in both direction (low 1 and high 4).
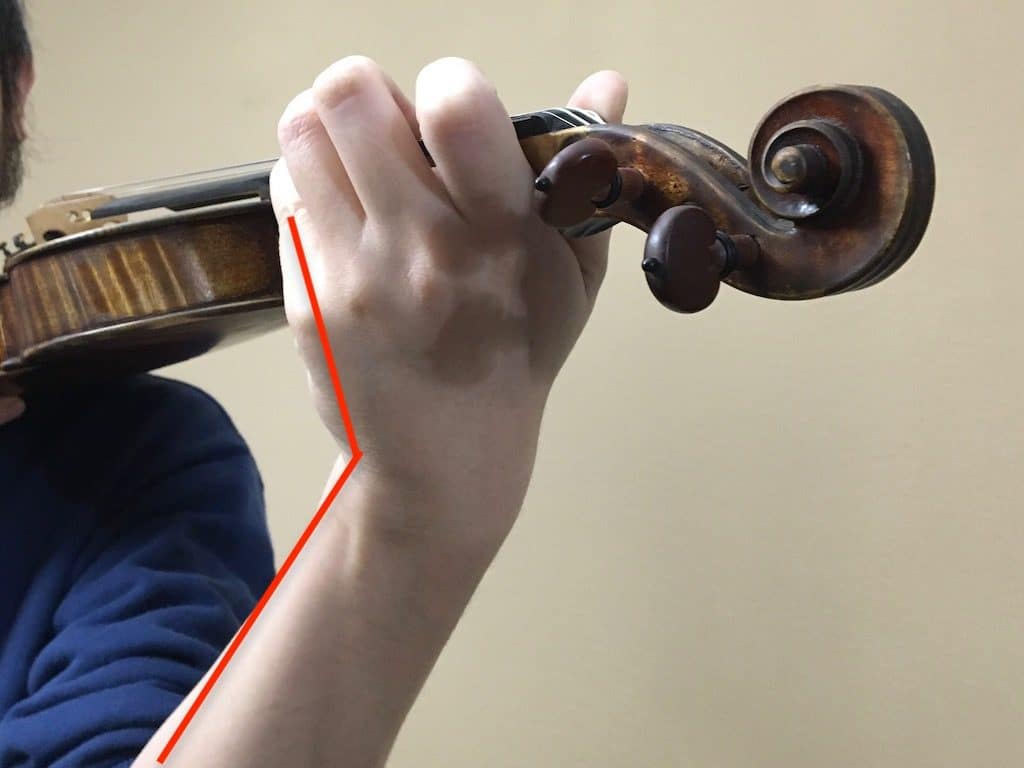
The following three images show incorrect wrist postures. The third incorrect posture is likely caused by lack of left elbow rotation or using wrong side of finger tip. We will discuss this later and revisit the wrist problem.

Left Fingers Part 1: Maintain Finger Frame
The purpose of maintaining finger frame is to reduce the horizontal distance between the 3rd/4th (ring and pinkie) fingers and their target locations on the fingerboard in advance, so that they arrive easily without taking extra time. This is critical for precise intonation.
The following image shows the correct posture of the frame. 3rd and 4th fingers are more difficult to develop this technique. They’re relatively weak and need to reach further toward the player to maintain the frame.
Compare with an incorrect finger frame posture below. The fingers need to travel longer horizontal distance and therefore take more time.
Another common mistake is a completely curled 4th finger. This makes the 4th finger very immobile.
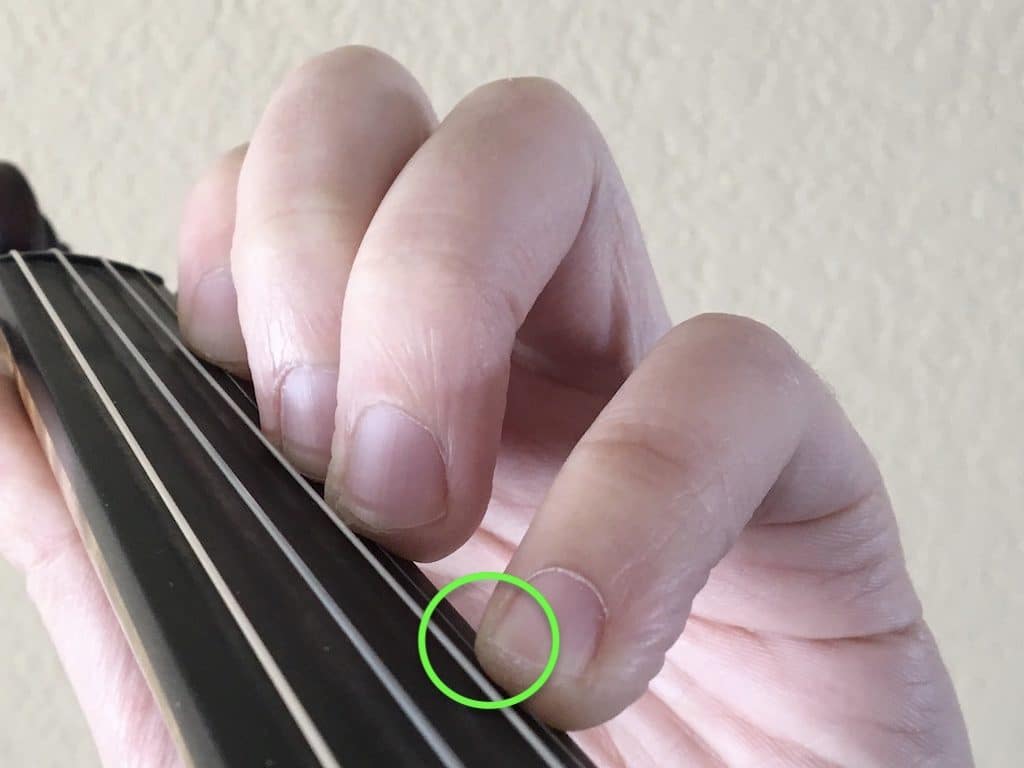
Left Fingers Part 2: Use Left Side of Finger Tips
Using the left side of finger tips ensures the ease of finger extension. It also helps us avoid touching the lower neighboring string. It’s actually normal that part of the finger tip is outside of the fingerboard edge when playing on the E-string. Note that this rule will change slightly when playing double stops if fingers need to avoid touching the higher neighboring string.
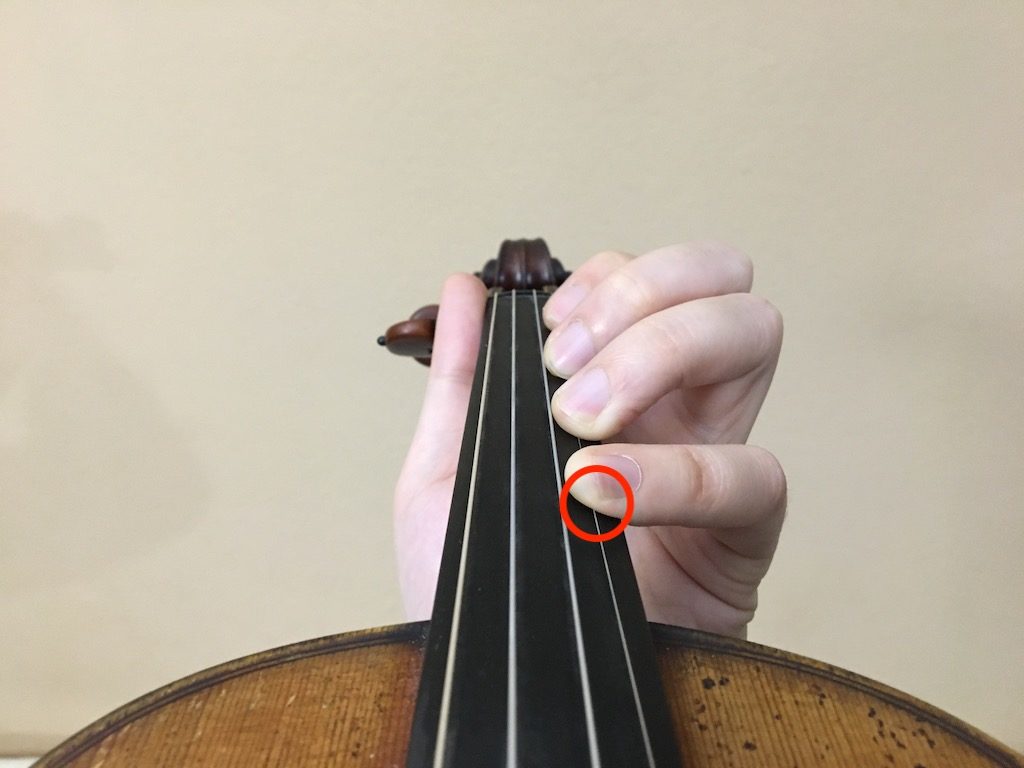
Here is a common mistake among beginners. The contact points of the fingers are on the right when playing on E-string. As a result, the fingers cannot extend properly.
To further assist the correction, check the shape of the left wrist. With the palm facing the player, the right side of the wrist should be straight.
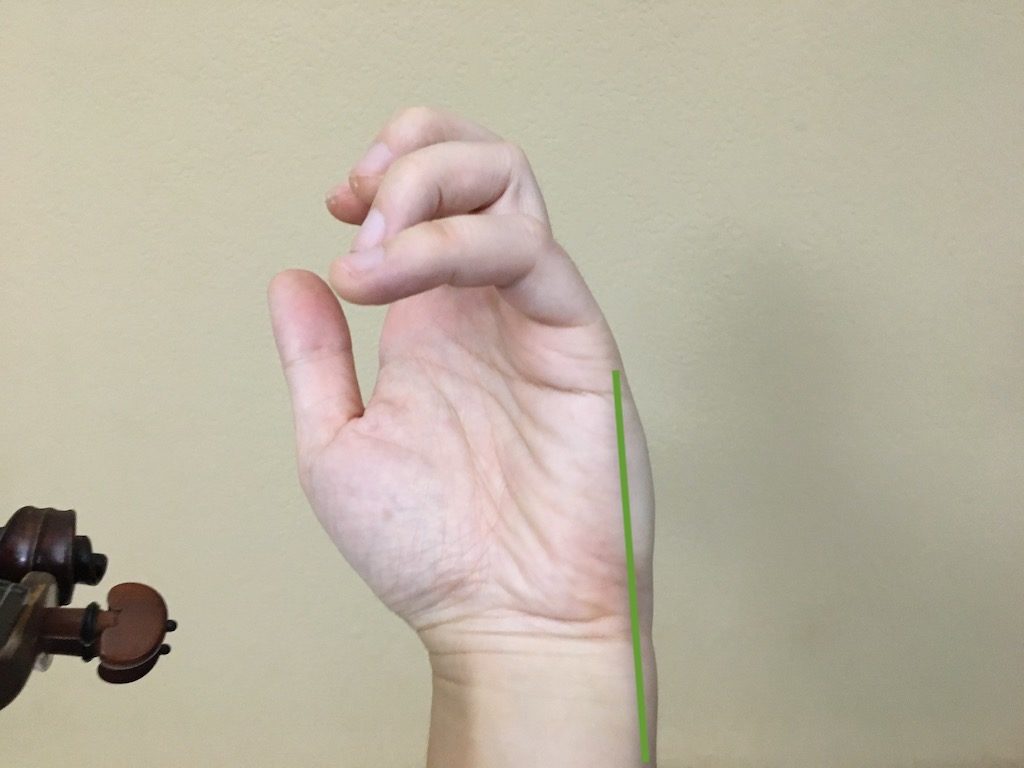
A crooked wrist is related to incorrect usage of finger tips.

The use of finger tip vs. finger pad is discussed in sound quality improvement page. To form a good habit of using the left side of finger tips, practice the following left hand pizzicato (plucking) exercise:
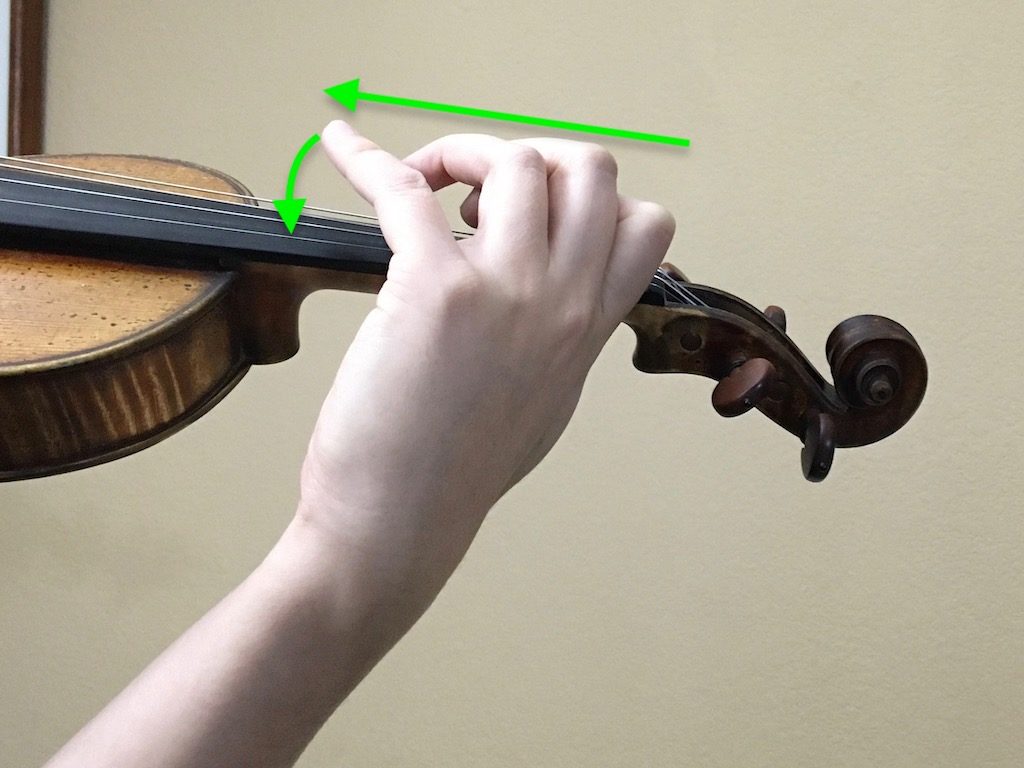
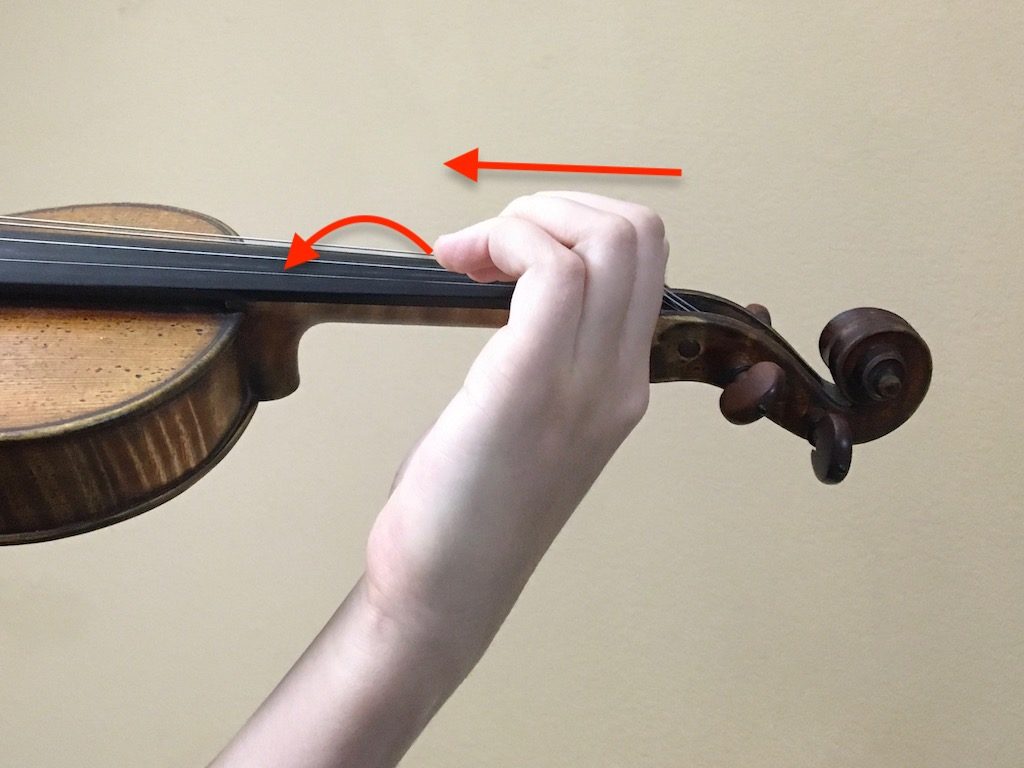
Left Fingers Part 3: Be Aware of Diagonal Movement When Crossing Strings. Change Left Elbow Angle to Assist String Crossing.
Much like the frets of guitar or ukulele, we must have a system of imaginary or “invisible frets” in our minds to help us play in tune. Since these “invisible frets” need to be perpendicular to the strings, the fingers must follow their paths when playing on different strings.
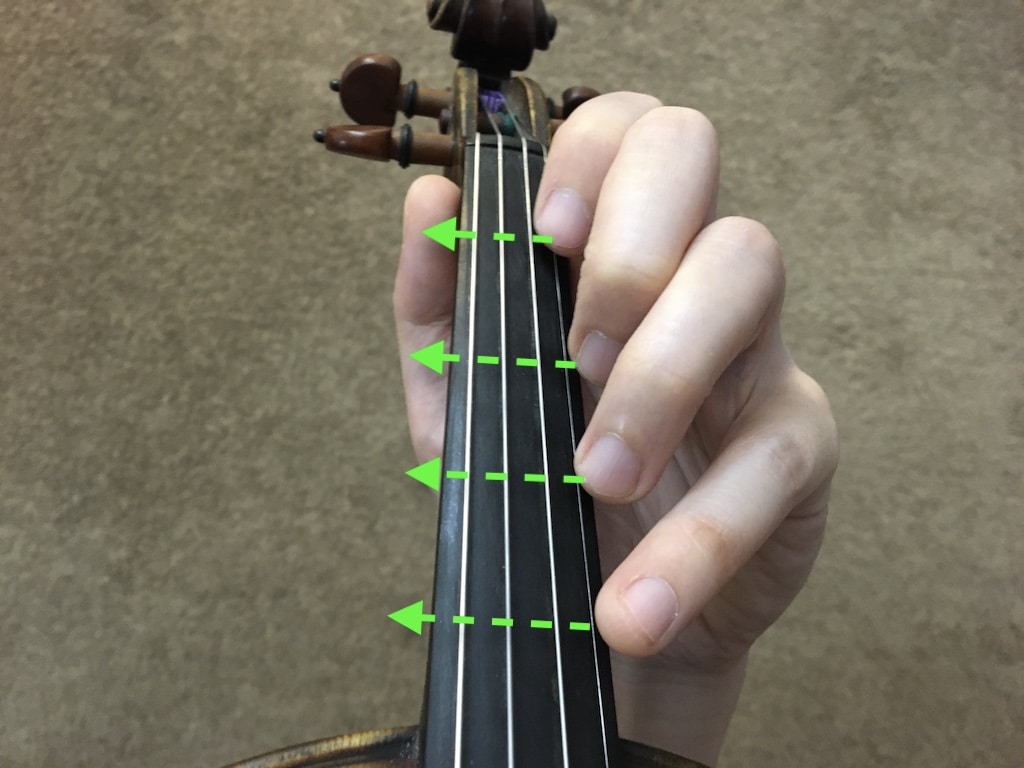
Any undesired diagonal movements will result in incorrect “fret” positions, effecting intonation. This is a common problems among beginners after the finger tapes are removed. This is because our left hand naturally has a diagonal relationship to the fingerboard and strings, and the fingers have natural tendencies to extend and retract along this diagonal path.
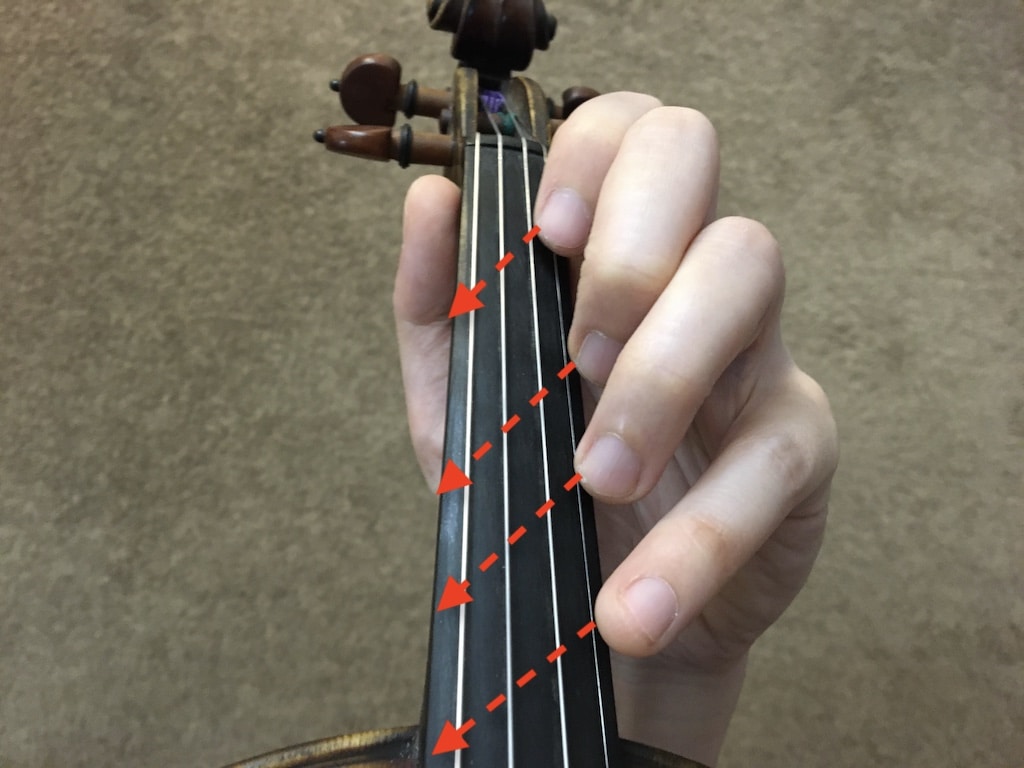
Note that in some cases, diagonal movement is actually correct and essential because the same finger is used for more than one “fret” positions. For example, when playing a C-major scale in first position, the first finger needs to move diagonally to a low 1 position in order to play an F-natural on the E-string. In addition, the 4th finger does need to use a bit more diagonal movement to reach the lower two strings because they’re further away.
Left Fingers Part 4: Lift and Drop Fingers Quickly.
In the sound quality improvement page, we discussed how lifting and dropping fingers quickly can help creating clean sound. To exercise the strength and speed of the fingers, intensionally lift them very high and tap the fingerboard quickly with lots of momentum. This hammering-like motion should create a knocking sound. Note that this is for exercising the fingers only. In normal playing we never want to lift the fingers so dramatically.